Stable Diffusion web UI 是基於 Gradio 的瀏覽器界面,用於 Stable Diffusion 模型的各種應用,如:文生圖、圖生圖等,適用所有以 Stable Diffusion 延伸的擴充模型。關於這個工具軟體的安裝方式請參考我之前寫過的另一篇圖文,請先安裝並學習使用後再接續看本文教學。這次主軸是由「Stability AI」推出的新模型「Stable Diffusion 2.0」,提供新的 768 x 768 px 高解析度擴散模型,使用 OpenCLIP-ViT/H 作為文本編碼器並從頭開始訓練。由 CompVis 領導的原始 Stable Diffusion 改變了開源 AI 模型的性質,並在全球範圍內催生了數百個其他模型和創新。
Stable Diffusion web UI 官方網站:https://github.com/AUTOMATIC1111/stable-diffusion-webui
Stable Diffusion 2.0 模型載點:https://huggingface.co/stabilityai/stable-diffusion-2
新的模型由於訓練集解析度的提高,因此能生成更高品質的影像,Stable Diffusion 這個模型有點像大總匯,不管是寫實、插圖、肖像等類型都可以產生,內含 Upscaler Diffusion模型,此模型可以將影像之解析度提高四倍。由於先前釋出實在太熱門導致很多爭議,如 AI 式抄襲、著作權的問題等,當然法律上仍然沒有這方面的規範,但也讓新版本的 Stable Diffusion 對於複製藝術家作品的能力大大降低,產出 NSFW 圖的能力也大幅受限,不過由於其是開源模型,很快就會有第三方強化,因此上述所說的問題也會慢慢淡化。
※ 備註:先前若已經安裝過 Stable Diffusion web UI,請記得在軟體根目錄下打指令 git pull 更新軟體至最新版,才能正常使用最新版的 Stable Diffusion 2.0 模型。
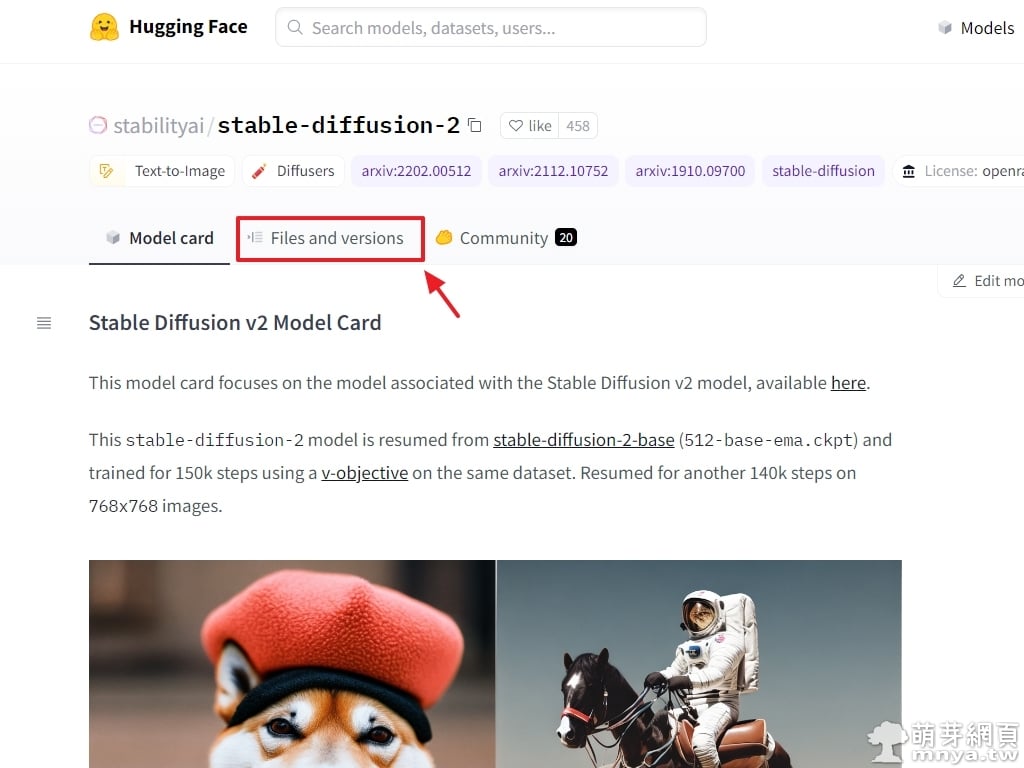
▲ 來到 Hugging「Face Stable Diffusion v2」的頁面,找到「Files and versions」並點入。
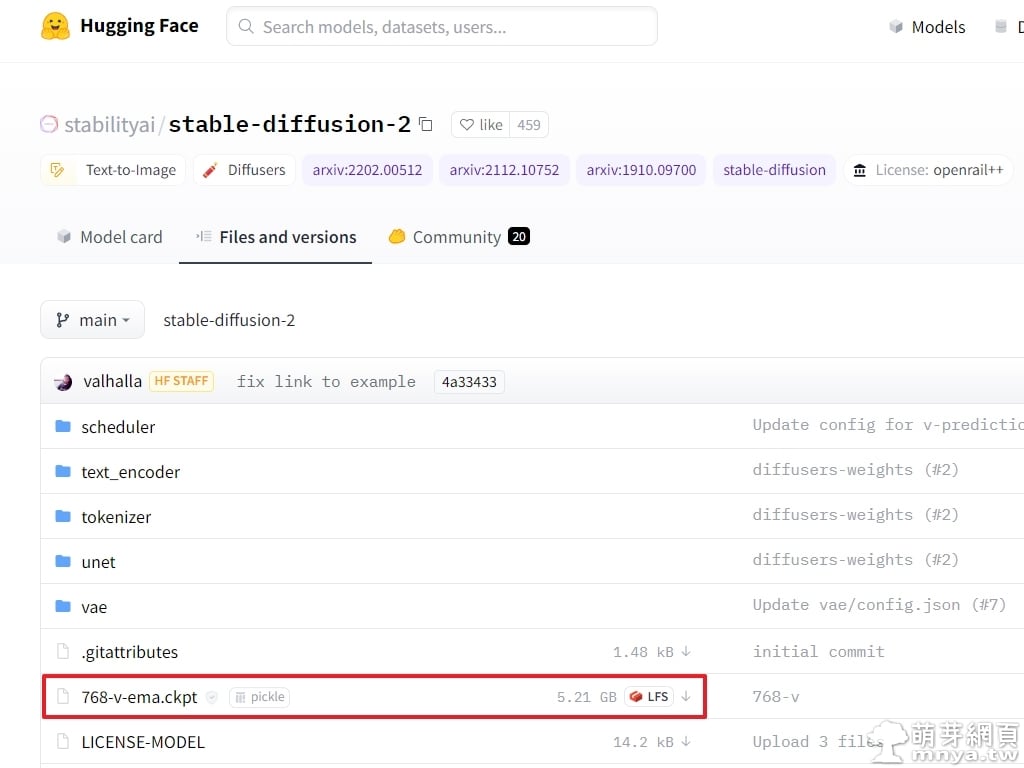
▲ 從這邊可以看到「768-v-ema.ckpt」即為最新的模型檔,檔案大小為 5.21 GB,點一下將它下載下來。接著將以下的配置文件存成同樣的檔名+ .yaml 副檔名,即「768-v-ema.yaml」。
model:
  base_learning_rate: 1.0e-4
  target: ldm.models.diffusion.ddpm.LatentDiffusion
  params:
    parameterization: "v"
    linear_start: 0.00085
    linear_end: 0.0120
    num_timesteps_cond: 1
    log_every_t: 200
    timesteps: 1000
    first_stage_key: "jpg"
    cond_stage_key: "txt"
    image_size: 64
    channels: 4
    cond_stage_trainable: false
    conditioning_key: crossattn
    monitor: val/loss_simple_ema
    scale_factor: 0.18215
    use_ema: False # we set this to false because this is an inference only config

    unet_config:
      target: ldm.modules.diffusionmodules.openaimodel.UNetModel
      params:
        use_checkpoint: True
        use_fp16: True
        image_size: 32 # unused
        in_channels: 4
        out_channels: 4
        model_channels: 320
        attention_resolutions: [ 4, 2, 1 ]
        num_res_blocks: 2
        channel_mult: [ 1, 2, 4, 4 ]
        num_head_channels: 64 # need to fix for flash-attn
        use_spatial_transformer: True
        use_linear_in_transformer: True
        transformer_depth: 1
        context_dim: 1024
        legacy: False

    first_stage_config:
      target: ldm.models.autoencoder.AutoencoderKL
      params:
        embed_dim: 4
        monitor: val/rec_loss
        ddconfig:
          #attn_type: "vanilla-xformers"
          double_z: true
          z_channels: 4
          resolution: 256
          in_channels: 3
          out_ch: 3
          ch: 128
          ch_mult:
          - 1
          - 2
          - 4
          - 4
          num_res_blocks: 2
          attn_resolutions: []
          dropout: 0.0
        lossconfig:
          target: torch.nn.Identity

    cond_stage_config:
      target: ldm.modules.encoders.modules.FrozenOpenCLIPEmbedder
      params:
        freeze: True
        layer: "penultimate"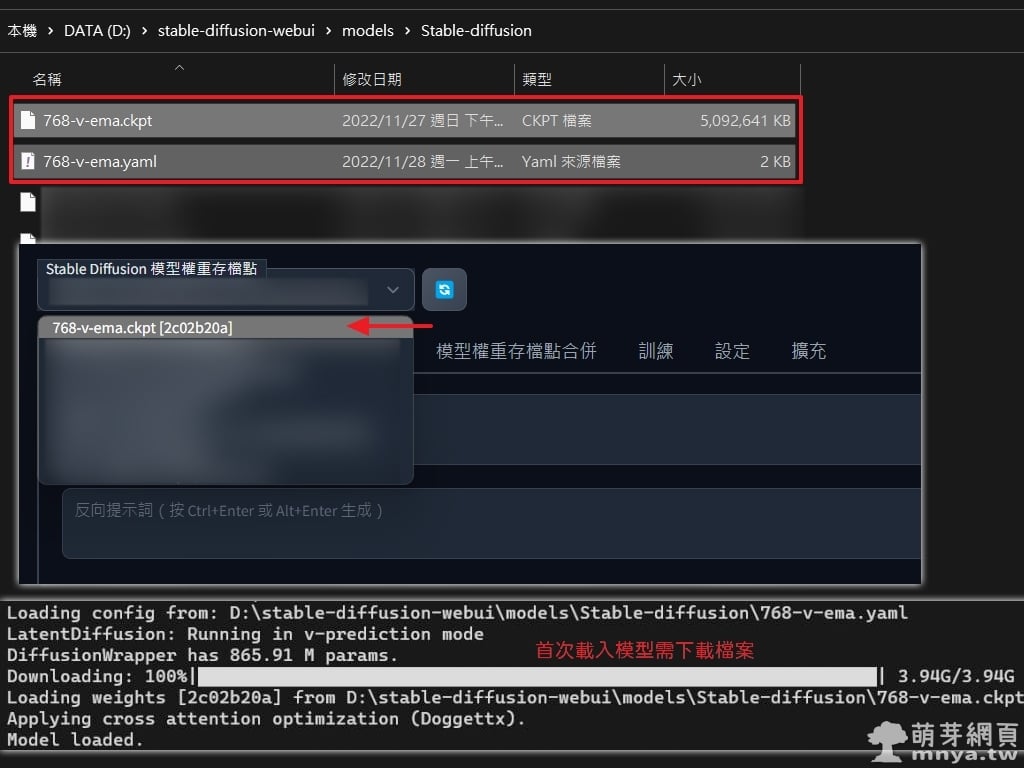
▲ 將兩個檔案放入軟體根目錄後「models\Stable-diffusion」路徑下,並重新啟動,打開後若尚未選擇模型權重存檔點「768-v-ema.ckpt」請記得選好,首次載入模型需要下載接近 4 GB 的檔案。
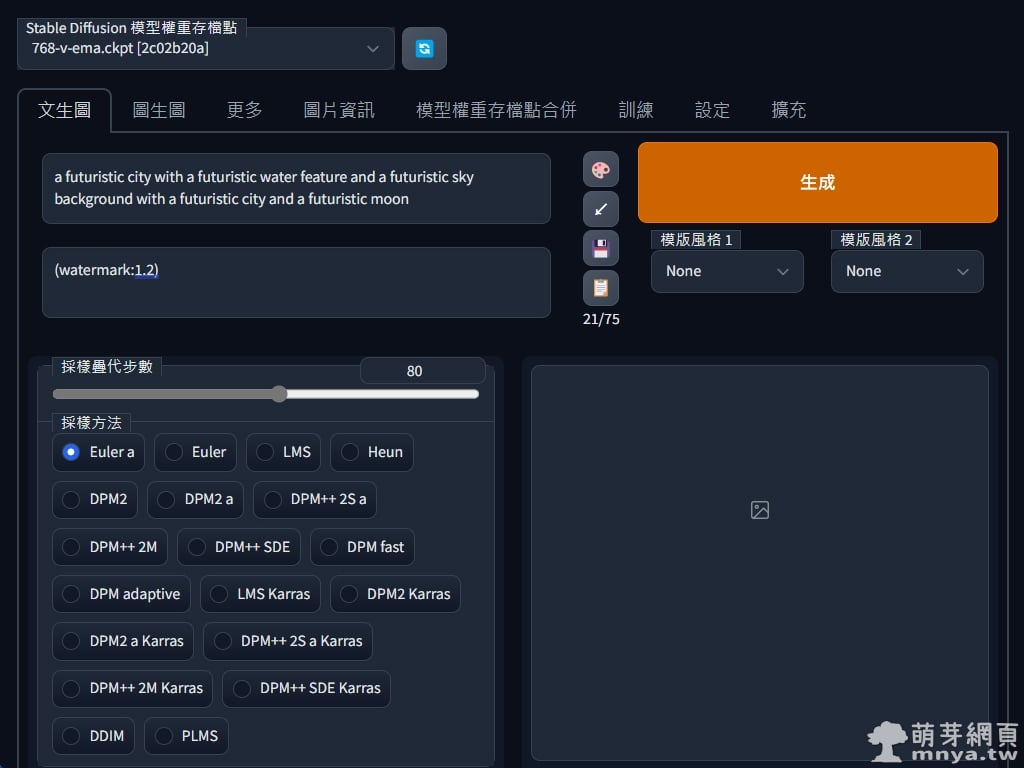
▲ OK!模型成功載入,這邊就可以開始輸入提詞、反向提詞、疊代步數等參數。
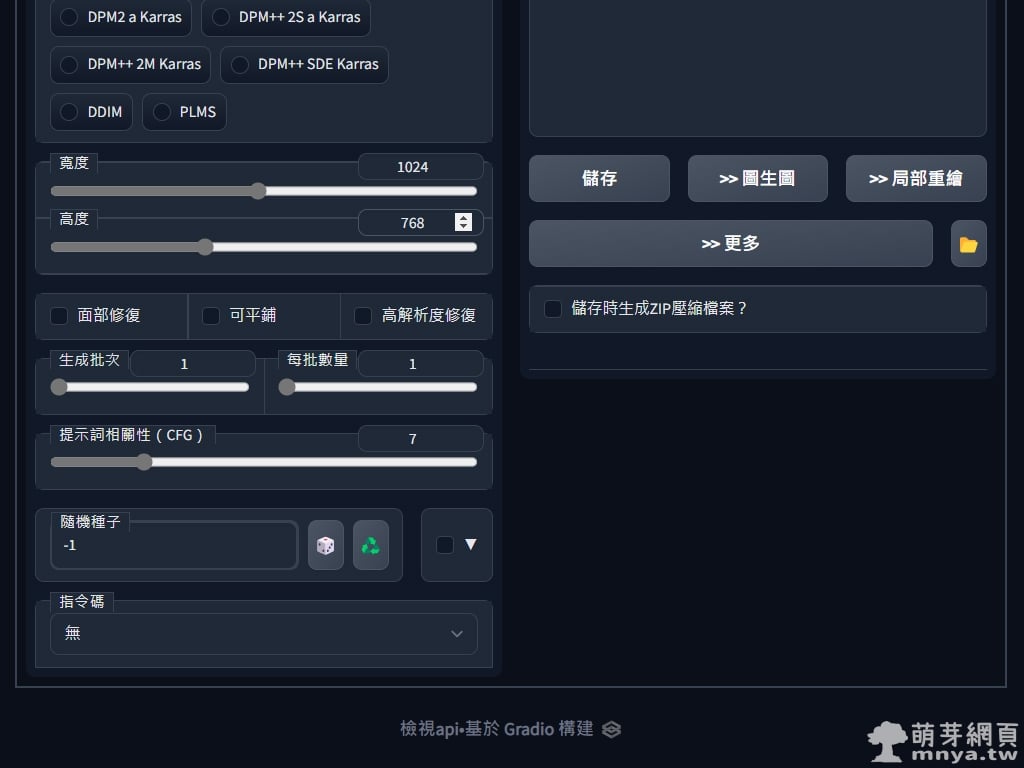
▲ 先在 1024 x 768 px 下輸出幾張圖畫當示範吧!反向提詞皆為 (watermark:1.2)。

▲ 提詞:a futuristic city with a futuristic water feature and a futuristic sky background with a futuristic city and a futuristic moon

▲ 提詞:a futuristic city with a lot of tall buildings and a lot of tall skyscrapers at night time with a bright sun in the sky

▲ 提詞:a painting of a sunset with a mountain in the background and a body of water in the foreground, by Makoto Shinkai

▲ 提詞:a cityscape with a very tall building in the middle of it at night time with a cloudy sky, by Makoto Shinkai




 《上一篇》Stable Diffusion web UI 正體中文(繁體中文)語言包 zh_TW.json
  《下一篇》Stable Diffusion web UI x Cyberpunk Anime Diffusion:本機 AI 生成 Cyberpunk 動漫角色


留言區 / Comments
萌芽論壇